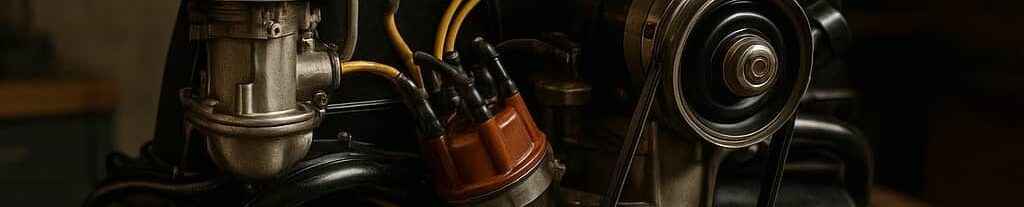
Restoring Original Gauges and Instruments

Restoring vintage gauges and instruments is a meticulous process that combines craftsmanship with a deep appreciation for history. Each piece tells a unique story, revealing insights into the technological advancements of its time. The restoration journey begins with careful assessment, where the condition of the gauge or instrument is evaluated. This includes examining its functionality, aesthetics, and any signs of wear or damage that may have occurred over the years.
One of the key challenges in restoration is sourcing the correct materials and components to ensure authenticity. Vintage instruments often require specific parts that may no longer be in production, necessitating a combination of research and innovation. Technicians must possess a thorough understanding of the original specifications and designs, as even the slightest deviation can alter the instrument’s value and character.
Another critical aspect of the restoration process is maintaining the integrity of the original finish while restoring functionality. This involves delicate cleaning methods and techniques that preserve the original patina, all while ensuring that the gauges can operate as intended. The ultimate goal is not only to return these instruments to a fully operational state but also to enhance their aesthetic appeal, allowing them to shine as the pieces of art and engineering they truly are.
Assessing the Condition of Your Vintage Gauges Before Restoration
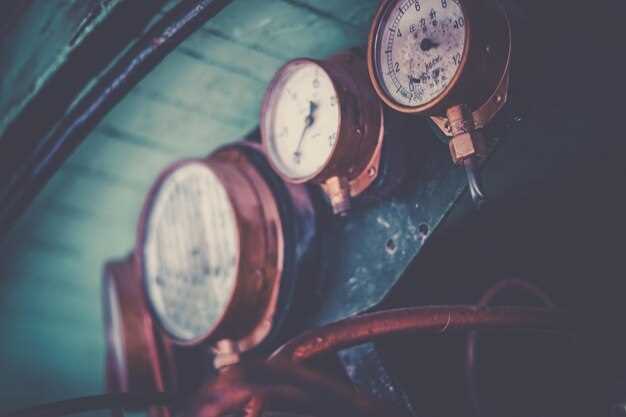
Before embarking on the restoration process of vintage gauges and instruments, it is crucial to conduct a thorough assessment of their current condition. This initial evaluation will inform the restoration strategy, helping to prioritize repairs and determine the necessary resources.
Begin by closely inspecting the exterior of the gauge. Look for any signs of physical damage such as dents, scratches, or corrosion. These imperfections can impact both aesthetic appeal and functional performance. Take note of any missing components, as this may affect the restoration approach.
Next, examine the condition of the faceplate and the glass cover. The faceplate should be clear and free of fading or discoloration. If the glass is cracked or cloudy, it may need replacement to restore visibility and authenticity. Document any imperfections for reference during the restoration process.
Inside the gauge, check the mechanism for any signs of wear or malfunction. Gently test the needle movement to identify any sticking points or inaccuracies. This mechanical evaluation is essential as it determines if internal cleaning or replacement parts will be necessary. Pay attention to the calibration as well, ensuring that any adjustments needed are noted for later correction.
Another important aspect to consider is the wiring and electrical components, if applicable. Check for frayed wires, loose connections, or any signs of corrosion that could jeopardize functionality. Assess whether any rewiring or component replacement will be necessary to achieve proper restoration.
Finally, evaluate the historical significance and originality of the gauge. Research its background, checking for original markings, labels, and finishes. This knowledge is vital as it will guide the restoration process, ensuring that the final outcome remains true to the gauge’s original design and intent.
In summary, assessing the condition of your vintage gauges before restoration involves an in-depth evaluation of both external and internal elements. This comprehensive understanding will help inform the restoration process and preserve the integrity of these unique instruments.
Step-by-Step Process for Cleaning and Repairing Gauges
Start by gathering all necessary tools and materials for cleaning and repairing gauges. Essential items include a soft brush, microfiber cloths, cotton swabs, isopropyl alcohol, and specialized gauge repair kits.
Before proceeding, ensure the gauge is removed from its mounting position. This reduces the risk of damage during the cleaning process. Carefully disconnect any wiring or connections associated with the gauge.
Begin the cleaning process by using a soft brush to gently remove any dust or debris from the gauge face and casing. Pay special attention to corners and hard-to-reach areas where dirt may accumulate.
Dampen a microfiber cloth with isopropyl alcohol and wipe the gauge face to remove fingerprints, smudges, and grime. Avoid excessive moisture, as it can damage internal components. Use cotton swabs for precision cleaning around the needle and other delicate parts.
Once the exterior is clean, examine the internal mechanisms for any signs of wear or corrosion. If necessary, disassemble the gauge using the appropriate tools. Document the disassembly process for easier reassembly later.
Inspect components such as the needle, dial, and backing plate for damage. Replace any broken parts using a gauge repair kit, ensuring that all replacements match the original specifications.
If the needle is sticky or not moving freely, carefully apply a small amount of lubrication to the pivot point. Ensure the lubricant is compatible with the materials in the gauge to prevent damage.
After cleaning and replacing any faulty components, reassemble the gauge following the documentation created during disassembly. Ensure all screws and fittings are securely tightened without over-tightening.
Finally, conduct a functionality test before reinstalling the gauge. Connect it to the power source and check for proper operation, ensuring that the needle responds accurately to changes in input.
Once confirmed to be working correctly, carefully re-install the gauge in its original mounting position, reconnecting any wiring as needed. The gauge is now clean, repaired, and ready for use.
Finding Authentic Replacement Parts for Accurate Restoration
When restoring vintage gauges, sourcing authentic replacement parts is crucial for achieving an accurate restoration. Genuine components not only enhance the aesthetic appeal but also ensure the functional integrity of the instruments. The first step in this process involves thorough research to identify the original manufacturers or trusted suppliers that specialize in vintage instruments.
Online forums and communities dedicated to gauge restoration can be invaluable resources. Engaging with fellow enthusiasts often leads to recommendations for reputable vendors who carry authentic parts. Websites that focus on vintage automotive or aviation instruments are also excellent places to start your search. They may offer original factory components, or at the very least, high-quality reproductions that closely match the original specifications.
Moreover, attending vintage car shows or instrument auctions can provide direct access to parts dealers and collectors. Networking in these environments can yield leads on hard-to-find items that are crucial for maintaining the authenticity of the restoration. Additionally, salvage yards that specialize in old vehicles often have a collection of gauges and instruments that can be harvested for parts.
It is also essential to verify the authenticity of the parts before making a purchase. Check for markings, labels, and other identifiers that reflect the original manufacturing details. Catalogs or manuals from the era can aid collectors in understanding what to look for. Furthermore, documenting the origin of the components ensures transparency in the restoration process, which can enhance the value of the finished product.
Finally, patience is key when searching for authentic replacement parts. The quest may require time and persistence, but the reward of restoring vintage gauges to their original condition is significant. Every genuine part contributes to the nostalgia and historical significance of these fascinating instruments.


