
How to Restore Chrome Parts on a Classic

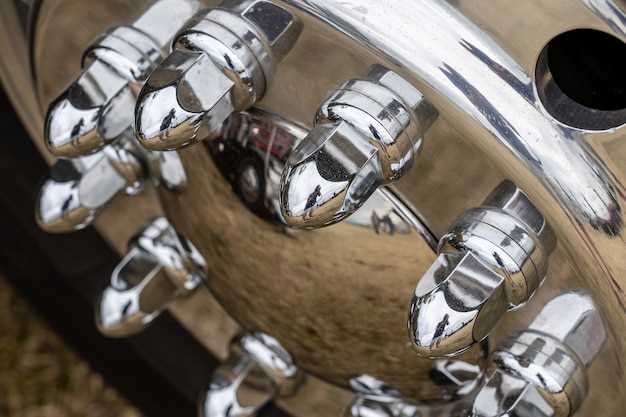
The allure of classic cars lies not just in their timeless design, but also in the gleaming chrome accents that define their elegance. Restoring chrome parts on these vehicles is crucial for preserving their aesthetic appeal and ensuring they shine like they did when they first rolled off the production line. This guide aims to provide car enthusiasts and restorers with practical techniques and insights into rejuvenating chrome components, allowing each classic automobile to regain its former glory.
Chrome parts can be susceptible to wear, rust, and corrosion over time, making restoration both an art and a necessity. Whether you’re dealing with bumpers, trim pieces, or grille accents, understanding the proper restoration methods can significantly enhance the overall appearance of your classic car. In this article, we will explore essential tools, techniques, and best practices to effectively restore chrome parts, helping you achieve the best possible results while maintaining the integrity of your cherished vehicle.
From assessing the condition of chrome to preparing it for polishing, we will cover each step in detail. You will learn about common challenges faced during restoration, as well as tips to avoid mistakes that could damage these valuable parts. With a mix of practical advice and industry insights, this guide is designed for both novice and experienced restorers, ensuring that everyone can bring new life to their classic chrome components.
Assessing the Condition of Chrome and Identifying Damage
Chrome parts on classic cars are not only essential for aesthetics but also for preserving the vehicle’s value. Assessing the condition of chrome is a critical step in the restoration process, and identifying damage early can save time and resources later.
The first step in evaluating chrome condition is a visual inspection. Look for signs of rust, pitting, or discoloration, as these issues often indicate underlying damage. Rust appears as orange or brown spots, while pitting presents as small craters in the surface. Discoloration can show up as a loss of shine or a chalky appearance, commonly caused by oxidization.
Once you’ve completed a visual check, proceed to tactile assessments. Run your fingers over the chrome surface; a rough texture suggests significant wear or corrosion. Additionally, use a microfiber cloth to wipe the chrome. If the cloth picks up flakes or debris, this points to deterioration that may require immediate attention.
Do not overlook areas that may retain moisture, such as behind bumpers or around seams, as these are prone to hidden rust. A magnet can help identify chrome parts made of ferrous metals that may be more susceptible to rusting. Non-ferrous chrome, such as aluminum or stainless steel, generally withstands the elements better.
If you suspect damage is beyond surface-level, deeper inspection is warranted. Consider employing professional evaluation techniques or using restoration kits designed for chrome repair. Understanding the extent of damage will help in determining the best restoration approach, whether it be polishing, re-chroming, or replacing the affected parts.
In conclusion, systematic assessment of chrome parts involves visual and tactile evaluations, along with an understanding of potential hidden damages. By accurately identifying issues, you can effectively plan for the restoration process, ensuring your classic car retains its charm and value.
Step-by-Step Process for Chrome Polishing and Repair
Restoring chrome parts on classic cars is essential for maintaining their original aesthetic and value. The chrome finish not only enhances the appearance but also protects the underlying metal. Follow this step-by-step process to effectively polish and repair chrome surfaces.
Step 1: Gather Materials – Collect all necessary materials before starting the restoration process. You will need chrome polish, a soft microfiber cloth, aluminum foil, water, and a bucket. If repair is needed, prepare tools such as sandpaper (varying grits), rust remover, and protective gloves.
Step 2: Clean the Surface – Start by thoroughly cleaning the chrome parts. Use water and a mild detergent to remove dirt and grime. Rinse and dry with a clean cloth to ensure no residue remains, as contaminants can inhibit the polishing process.
Step 3: Assess Damage – Inspect the chrome for scratches, rust, and pitting. Determining the severity of the damage will dictate the repair methods needed. Minor scratches and dull spots can be polished out, while rust may require more intensive treatment.
Step 4: Repair Rust and Pitting – For areas with rust, use rust remover to treat affected spots. If pitting is present, gently sand the area with fine-grit sandpaper until smooth. Always follow up with a finer grit to feather the edges of the repair for a seamless finish.
Step 5: Chrome Polishing – Apply a small amount of chrome polish onto a microfiber cloth. Work in small circles across the chrome surface, allowing the polish to adhere and lift oxidation. Continue until the desired shine is achieved, adding more polish as needed.
Step 6: Buff the Surface – Once polishing is complete, switch to a clean section of the microfiber cloth to buff the chrome. This step enhances the luster and removes any remaining polish. Finish by using a piece of aluminum foil to create a reflective finish along edges and detailed areas.
Step 7: Final Inspection – After polishing, conduct a final inspection to ensure all areas meet your restoration standards. Touch up any spots that may need further attention and give the chrome a final wash and dry.
Step 8: Maintenance – To preserve the restored chrome, regularly clean it with a safe product to prevent future corrosion. Consider applying a protective wax or sealant after restoration to enhance durability.
Following this step-by-step process will help you achieve a high-quality restoration of chrome parts on your classic car, ensuring they remain beautiful and protected for years to come.
Choosing the Right Products for Long-lasting Chrome Protection
When it comes to restoring chrome parts on classic cars, selecting the right products is essential for ensuring their longevity and aesthetic appeal. The perfect combination of cleaning, polishing, and protective agents can safeguard chrome surfaces from corrosion, tarnish, and environmental damage.
First and foremost, begin with a high-quality chrome cleaner that effectively removes dirt, grime, and oxidation. Look for products that are specifically formulated for chrome surfaces, as they tend to be more effective in preserving the integrity of the finish. Avoid harsh abrasives that can scratch the chrome during the restoration process.
After cleaning, it is vital to apply a chrome polish. A good polish not only enhances the shine but also creates a protective layer that can help repel moisture and other corrosive elements. Choose a polish that offers long-lasting results to minimize the need for frequent reapplication. Many classic car enthusiasts recommend using a product containing carnauba wax for added durability and gloss.
To further protect your restored chrome parts, consider using a dedicated chrome sealant. These sealants provide a barrier against the elements, ensuring that the chrome remains pristine over time. Look for sealants designed to withstand UV exposure and extreme weather conditions, as they will offer the best protective qualities for classic cars frequently driven in various environments.
Regular maintenance is equally important for sustaining chrome protection. Invest in microfiber cloths for gentle cleaning, and routinely check for signs of wear or damage. Immediate attention to minor issues can prevent them from becoming major problems, safeguarding the investment in your classic car restoration.
In summary, selecting the appropriate chrome care products involves understanding the specific needs of classic car restoration. A combination of a reliable cleaner, effective polish, and a top-tier sealant will not only enhance the appearance of chrome parts but also ensure they last for years to come.


